Blog
Looking to refresh your spaces with a splash of color and creativity? Want to paint a mural and need to cover large surfaces with even layers of paint? Wall painting has long been a popular way to transform urban environments or any room, but if you're looking for a solution that combines efficiency with impressive results, high-coverage spray paint is your best friend. Forget traditional rollers and brushes; in the world of DIY and modern art, spray paint has become a revolutionary tool for art projects and interior renovations.
Use high coverage sprays This innovative spray for painting walls offers a range of advantages that cannot be ignored. It provides faster and more even application, allowing you to cover large areas in less time and with less effort. Furthermore, its specialized formula ensures complete coverage, even on surfaces that are typically difficult to paint, guaranteeing a smooth and uniform finish that enhances the beauty of your spaces.
In this article, we'll guide you through every essential step of painting a wall with high-coverage spray paint. From selecting the perfect color and preparing the surface to application techniques and tips for a long-lasting finish, we'll provide all the information you need to become a spray-painting wall expert. Get ready to unleash your creativity and transform your walls in ways you never thought possible.
Advantages of Using High Coverage Sprays
High-coverage sprays are emerging as a safe option for several compelling reasons, not only making the job easier but also improving the quality of the project:
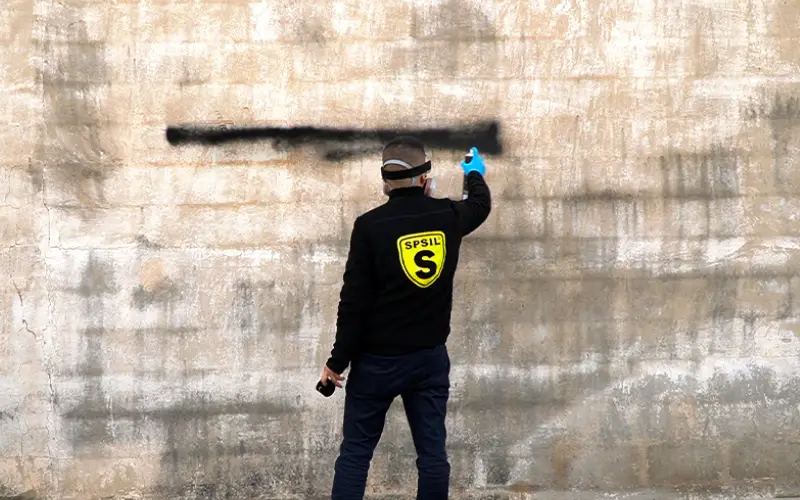
Uniform and Consistent Coverage: High-coverage sprays are designed to distribute paint evenly, avoiding the unsightly marks and lines often left by brushes and rollers. This uniformity is especially beneficial for surfaces with irregular textures, such as street walls where graffiti is painted, where traditional methods may fail to provide complete coverage.
Efficiency and Time Savings: With their ability to cover larger areas in less time, high-coverage sprays significantly reduce working hours compared to traditional methods. Ideal for last-minute projects or when time is of the essence, such as quick renovations or decorating updates.

Ease of Use: Their ease of use makes them ideal for both DIY enthusiasts and urban artists, as well as experienced professionals. Furthermore, the spray format allows easy access to corners and hard-to-reach areas, ensuring complete coverage without the need for additional tools.
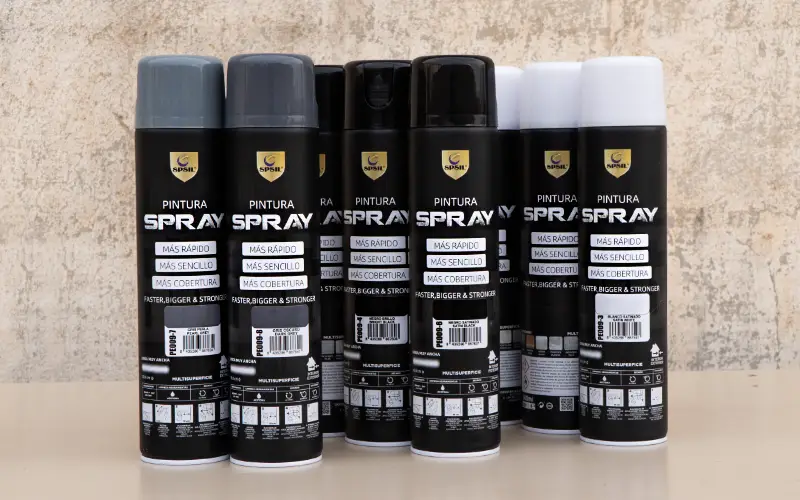
Professional Finish: The 600ml spray offers a more professional finish, with a smooth appearance and no brushstrokes or drips. It's available in different finishes, from matte to gloss, allowing for complete customization of the wall's style and appearance.
Less Clutter and Cleaning: Unlike rollers and brushes, spray paint significantly reduces paint splashes and drips. Post-painting cleanup is easier, as there are no brushes or rollers to clean.
Which 600ml spray should you choose?
To choose the right spray paint for your project, there are several key aspects to consider to ensure the best results. Here's a detailed guide to help you make an informed and effective choice.
First, it is fundamental identify the type of surface that you're going to paint. Common surfaces include plaster, concrete, wood, and metal, and each may require a different type of spray paint for the best adhesion and durability. Some sprays are formulated specifically for certain types of surfaces, so choosing a compatible one is crucial.
Then, you must choose the right formula for your projectWater-based and solvent-based formulas have distinct characteristics. Water-based formulas typically have a milder odor and dry faster, while solvent-based formulas can offer greater durability. It's also important to consider the environmental impact, opting for low-VOC formulas, especially for indoor projects or poorly ventilated spaces.
The color and finish selection It's also crucial to consider how your chosen color will interact with the light and ambiance of your space. Furthermore, it's important to understand the differences between matte, satin, and gloss finishes, as each can significantly alter the appearance of your wall.
Finally, you must consider the price. While it's important to stay within your budget, sometimes it can be more beneficial to invest in a more expensive product for its superior quality. Balancing cost with quality is essential to achieving the desired results in your painting project.
5 Steps to Prepare Your Wall
The key to a flawless finish lies not only in choosing the right high-coverage spray paint, but also in properly preparing the wall before applying it. Meticulous preparation can make all the difference between a mediocre job and a spectacular result. Here are the steps you should follow:
Step 1: Surface Cleaning
Start by making sure the wall is completely clean. Remove any traces of dust, dirt, and stains. To do this, use appropriate cleaning products that are effective on different types of stains and surfaces. A clean wall is essential for the paint to adhere properly.
Step 2: Wall Repair
Check the wall for cracks, holes, or imperfections. Use filler or joint compound to fill them properly. Once the filler is dry, lightly sand the repaired areas to ensure a smooth, even surface, ready for painting.
Step 3: Protection of the Surrounding Area
Before you start painting, protect nearby furniture, floors, and fixtures to avoid paint splatters. Cover them with drop cloths or plastic sheeting and use painter's tape to protect baseboards, window frames, and other areas you don't want to paint.
Step 4: Special Surface Treatment
If the wall has been painted before, prepare the surface by removing any loose paint and sanding any shiny areas. For new or bare walls, such as plaster or masonry, follow specific guidelines to ensure they are ready for painting.
Step 5: Ventilation and Safety
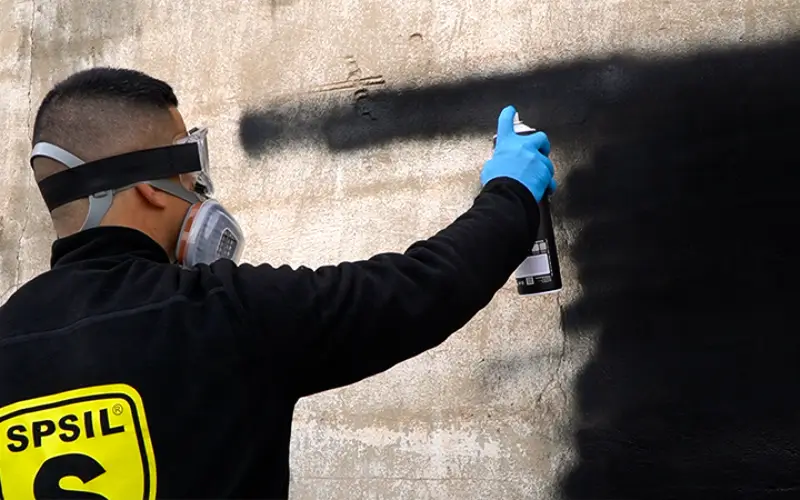
Maintain good ventilation in the work area for your safety and to facilitate paint drying. Wear protective equipment such as masks, especially if you will be sanding or working with chemicals.
With these steps, your wall will be perfectly prepared for painting. Cleaning, repairing, and protecting are key to a good start. Now that your wall is ready, you can move on to the exciting stage of transforming it with color. In the next section, we'll show you how to apply high-coverage spray paint effectively to achieve professional results on your painting project.
Application Techniques for the 600ml High Coverage Spray
With the wall perfectly prepared, it's time to bring your project to life with the high-coverage spray. Below, we guide you through the key steps for applying the spray effectively.
- Spray Test: Before painting, do a test spray on cardboard or an inconspicuous area. This will help you familiarize yourself with the spray pressure and pattern. You'll avoid unpleasant surprises that you can't fix later.
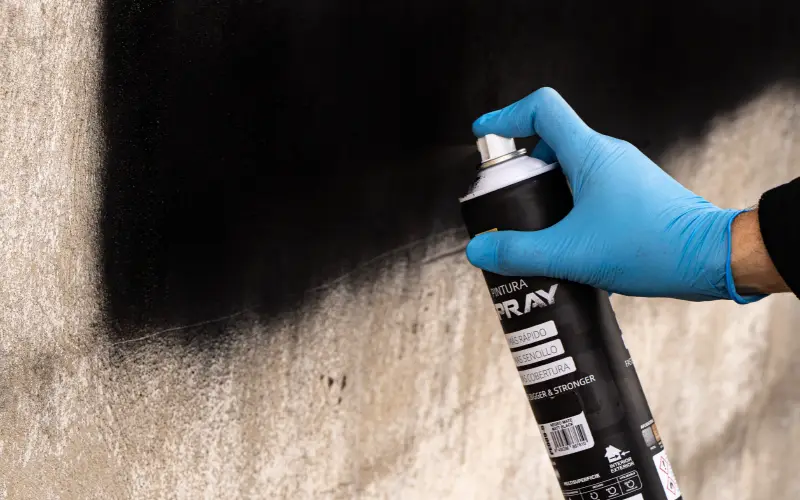
- Nozzle Adjustment: It is essential that the spray nozzle is always clean and correctly oriented for accurate and even application. A clogged or misaligned nozzle can cause irregularities in paint application, such as dripping or an uneven spray pattern. Before each use, check the nozzle and clean it if necessary to ensure the paint flows consistently and evenly.
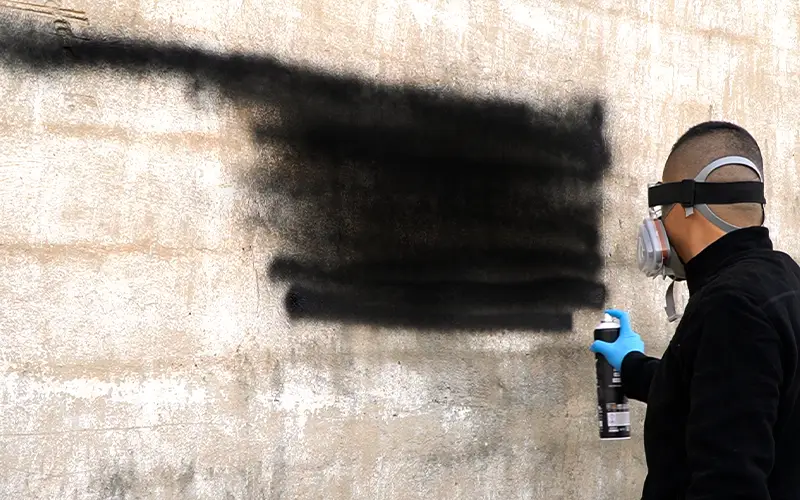
- Appropriate Application Distance: When applying the spray, maintaining a distance of 20-30 cm between the nozzle and the wall is key to preventing drips and ensuring even coverage. If you get too close, you can cause paint buildup and drips; if you move too far away, the paint may disperse too much and not cover the surface effectively. Find the right balance for optimal application.
- Constant Movements: The application technique, using constant, fluid movements, is crucial. Move the spray can from left to right or from top to bottom, slightly overlapping each pass. This technique helps prevent overspray and ensures even coverage without leaving any unpainted areas or excess paint.
- Thin Layers: Applying multiple thin coats, rather than one thick coat, is an effective technique for preventing drips and achieving a uniform finish. Thin coats dry faster and reduce the risk of runs, allowing for greater control and a more professional finish.
- Drying Time Between Coats: Respecting the drying time recommended by the manufacturer between each coat is crucial for the quality of the finish. Applying a new coat before the previous one has completely dried can result in an uneven finish and may affect the paint's adhesion and durability.
- Corners and Edges: When painting corners and edges, control is key. Use short bursts of spray and avoid over-application in these areas. This will help prevent excessive paint buildup, ensuring a clean, professional finish.
- Techniques for working at heights: To paint high areas safely and comfortably, using a ladder or spray extension is recommended. This allows you to maintain control and precision while applying the paint, without compromising your safety or the quality of the work. Make sure the ladder is stable and use safety equipment if necessary.
- Minimize Nebulization: Spray paint can create a fine mist; use protective equipment and cover surrounding areas.
- Ventilation: Keep the area well-ventilated to disperse the mist and fumes from the spray. We'll go into more detail about these last two points later, but for now, keep them in mind.
Applying high-coverage spray paint is an efficient and rewarding process. By following these steps and techniques, you'll be well on your way to achieving a stunning, professional finish on your wall. In the next section, we'll cover the final steps in the painting process and how to care for your newly painted wall.
Drying and Final Finishing
After carefully applying the high-coverage spray, the drying process and finishing touches are essential to ensure a durable and aesthetically pleasing finish. This stage of the project requires patience and attention to detail, as these are key elements for the effort invested to be reflected in the quality of the final result.
First, it is important to allow that each coat of spray dries completely before applying the next coat. Drying time may vary depending on factors such as humidity and ambient temperature. Once the final coat has been applied, it is crucial to allow it to dry completely before considering the wall ready for normal use. Typical drying times should be followed according to the manufacturer's recommendations.
Once the paint is dry, Inspect the wall carefully for uneven areas or areas that need retouching.If you find imperfections, make the necessary adjustments effectively so they blend seamlessly with the existing work. In some cases, a light sanding After the paint is completely dry, it can be beneficial to remove any imperfections and prepare the surface for further finishing, if desired.
You can also consider applying a protective layer, such as a sealant or a clear coatTo protect the paint and increase its durability, this is especially recommended in high-traffic areas or areas exposed to sunlight. For a professional-looking finish, pay attention to the final details. This includes carefully removing the painter's tape and cleaning up any paint residue on fixtures or the floor.
At SPSIL, we believe that by following all these recommendations you will succeed in your project, but if you still have any doubts or want to ask us anything, we are at your disposal 😉
How to Paint a Wall with High Coverage Sprays (600ml)
Are you looking to give your spaces a fresh look with a touch of color and creativity? Do you want to paint a mural?